Create relationships
You can create relationships between ServiceNow elements in the UPMX Relationship Editor. It is also possible to commit changes directly in the Relationship Editor and adjust settings to blacklist (block) or whitelist(authorize) particular user groups.
You can only map upstream, downstream, or both upstream and downstream relationships between tables available as Suggested Relationships or that your Administrator has approved. If you do not see an option to map a relationship between entities but require it, contact your Administrator.
Launch the Relationship Editor
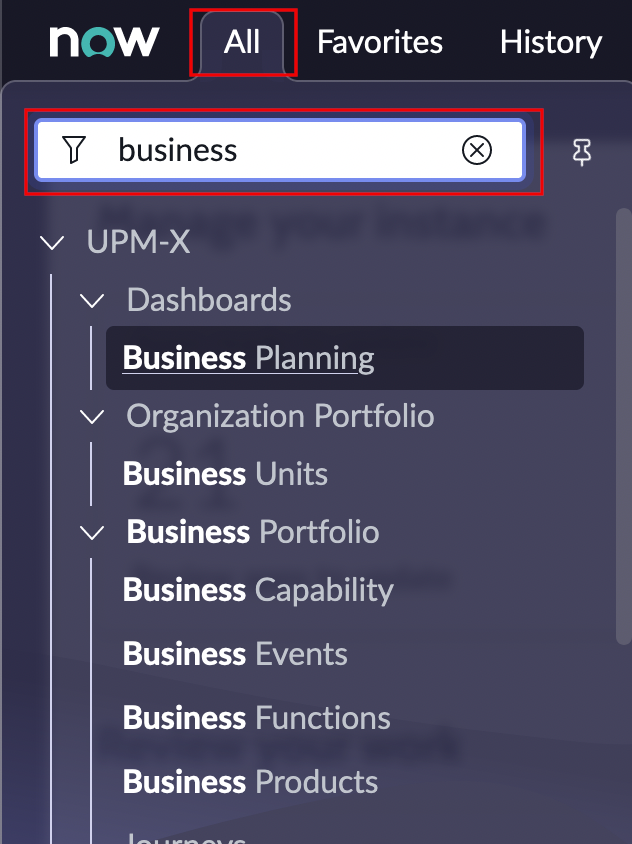
- Select the All button to access the application navigator.
- Filter for the table that contains the element you want to map.
- From the table view, select an element.
- Scroll down to the Relationships tab, and select Create Relationships.
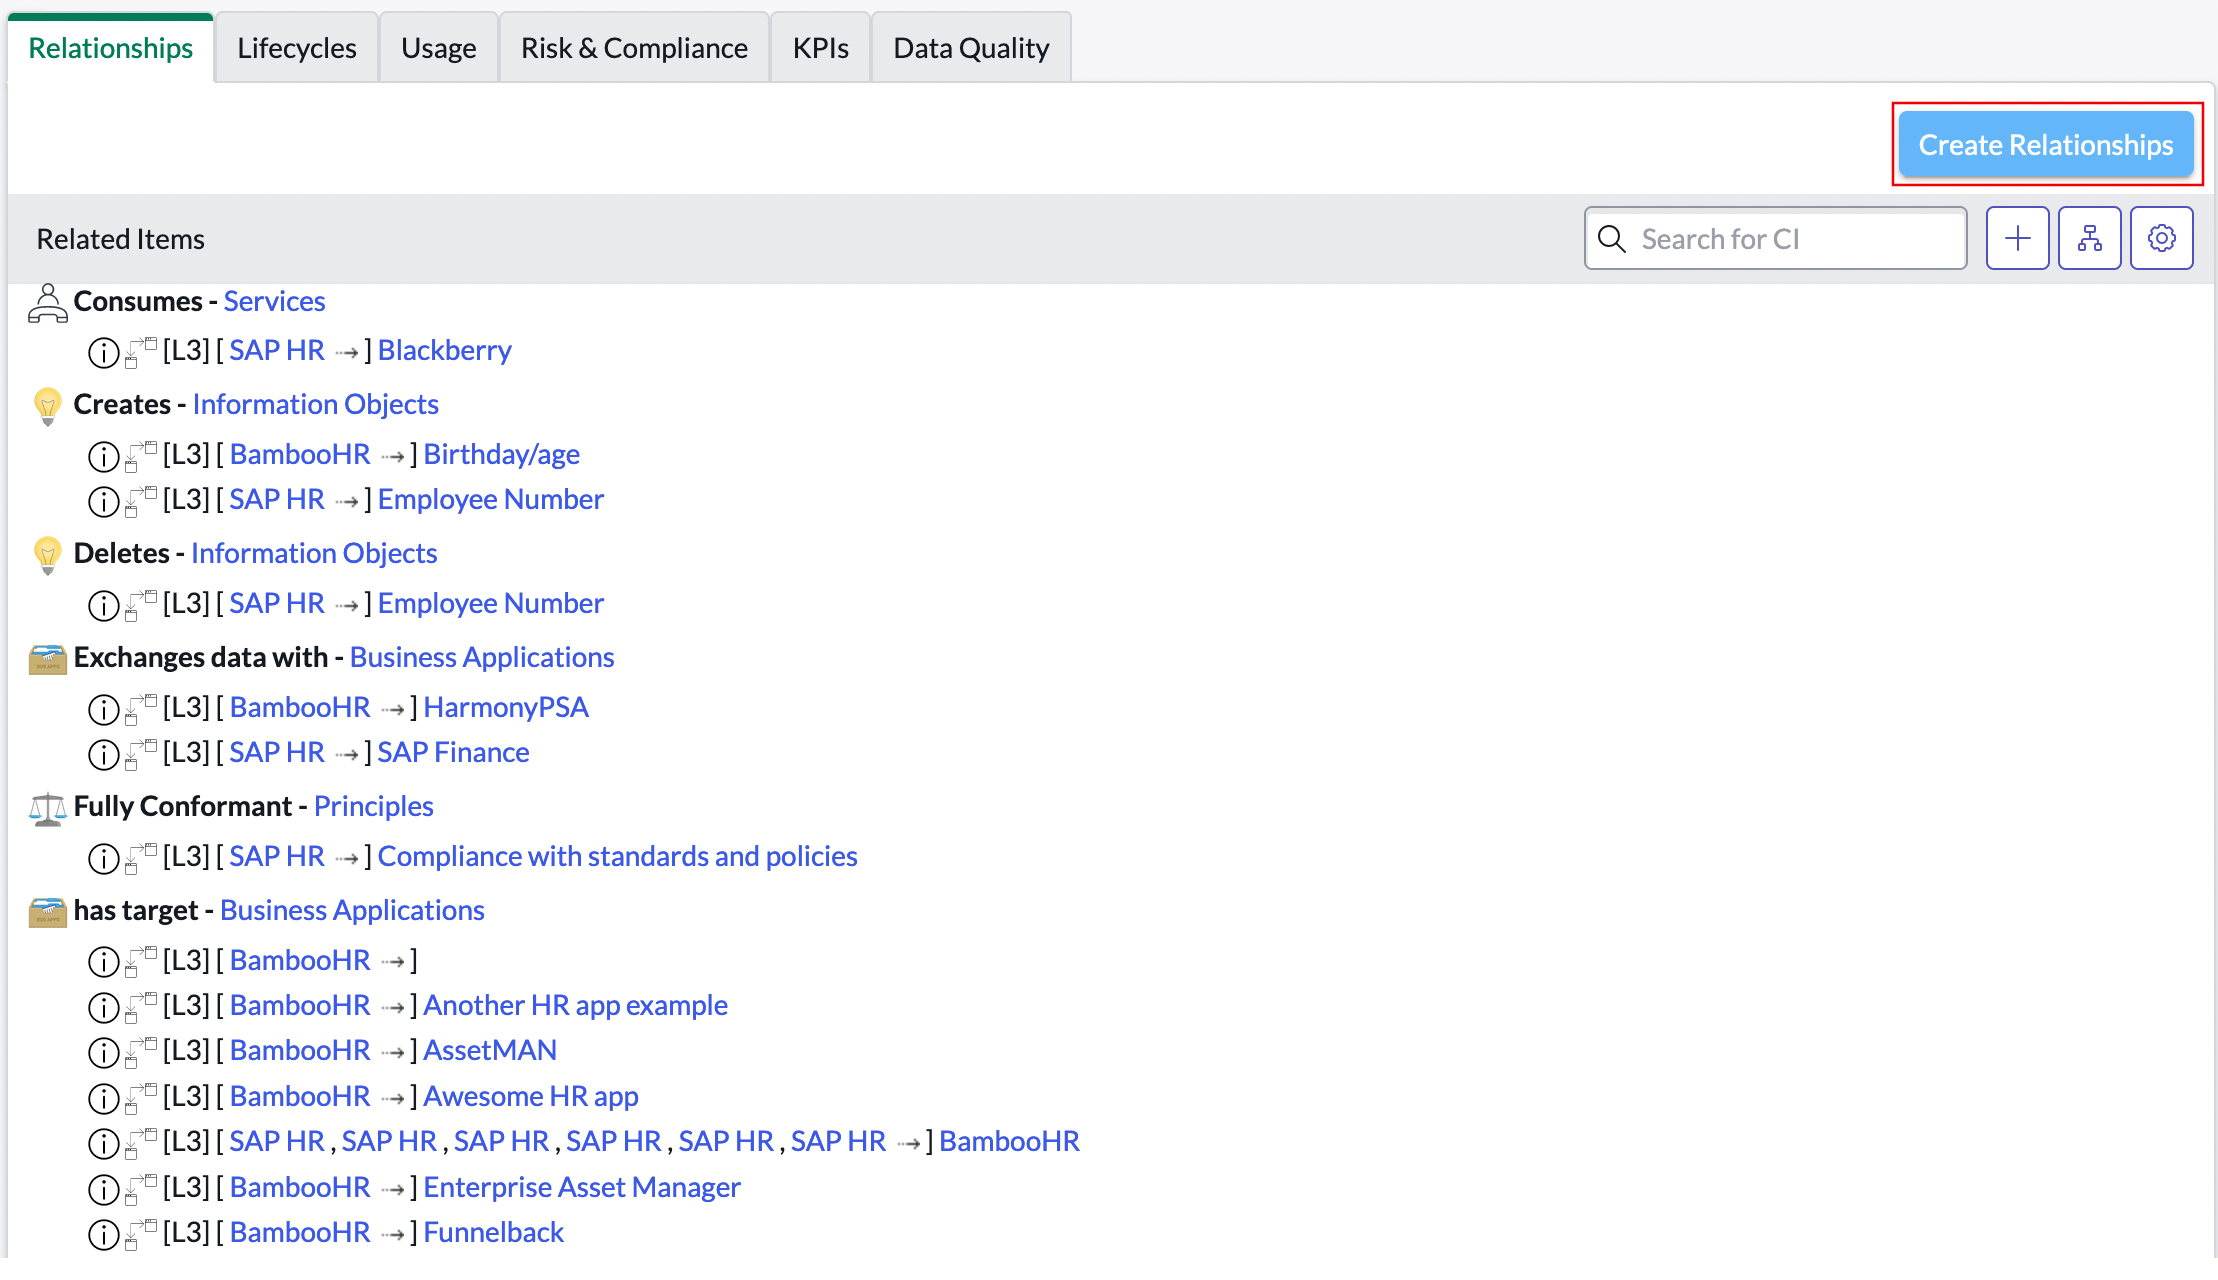
Element relationship listBefore launching the Relationship Editor, you can see information on relationships between the primary element and other elements in the relationship tab. You can customize this view by selecting the Settings button on the right-hand side of the Relationship tab.
Map relationships between elements
Initially, the primary element appears in the center of the editor.
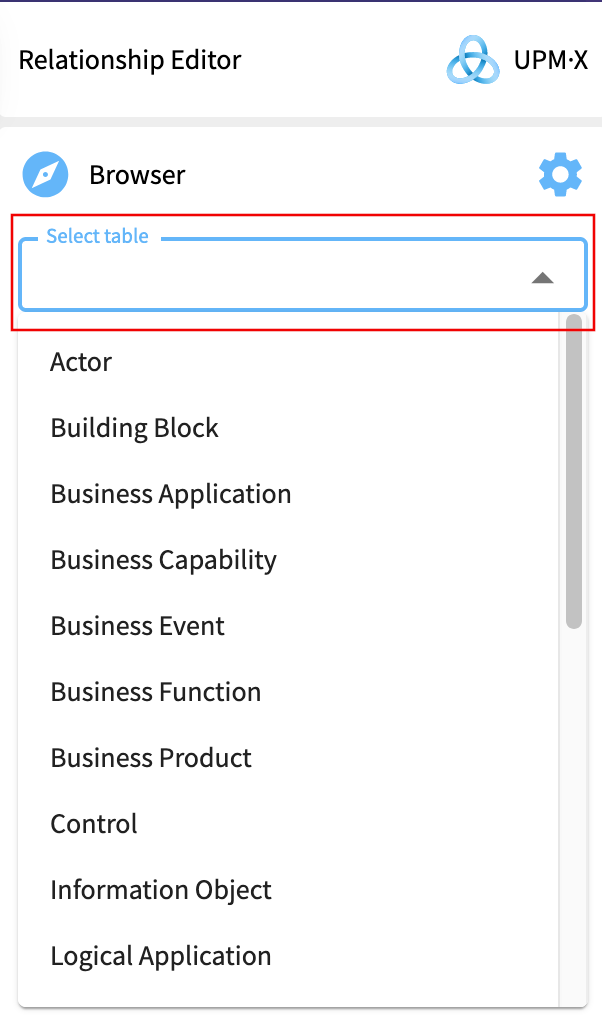
- Select the Select table box.
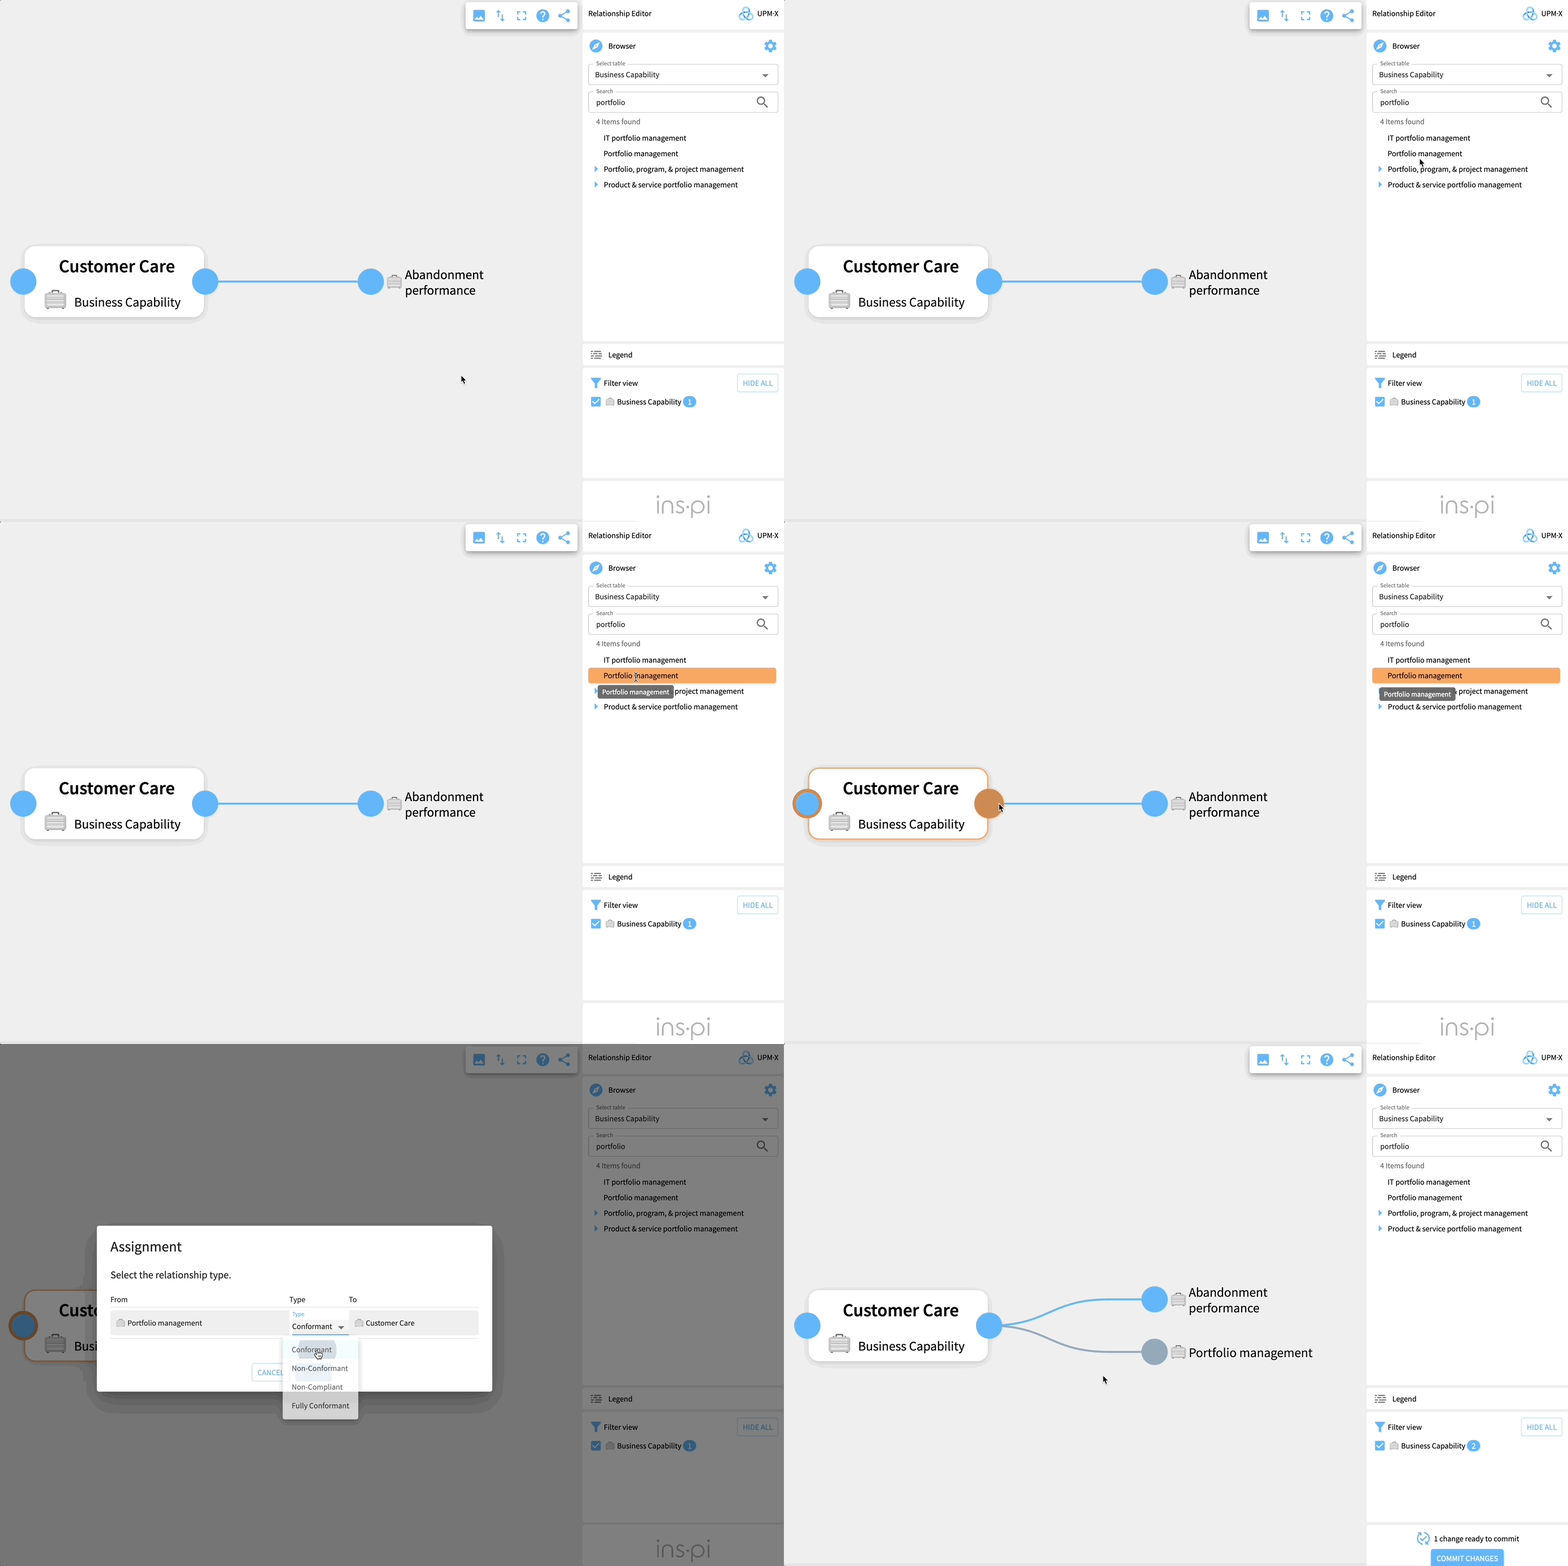
- Enter the table that contains the element you wish to map the primary element to or select an option from the dropdown menu. As you type, the options are filtered.
- Drag the element towards the primary element in the center of the Relationship Editor. An orange ring appears around the border of either the left or right circle or both - this indicates a valid connection point for a relationship.
- Move your cursor over the top of the left or right circle to make a connection. The circle will change to a solid orange color.
- If more than one relationship type is available a pop-up menu appears. Confirm the type of relationship you want to establish between the elements.
- Select Done.
Select multiple elements
- Select each element you want to map to the main element. Select each element again to deselect them.
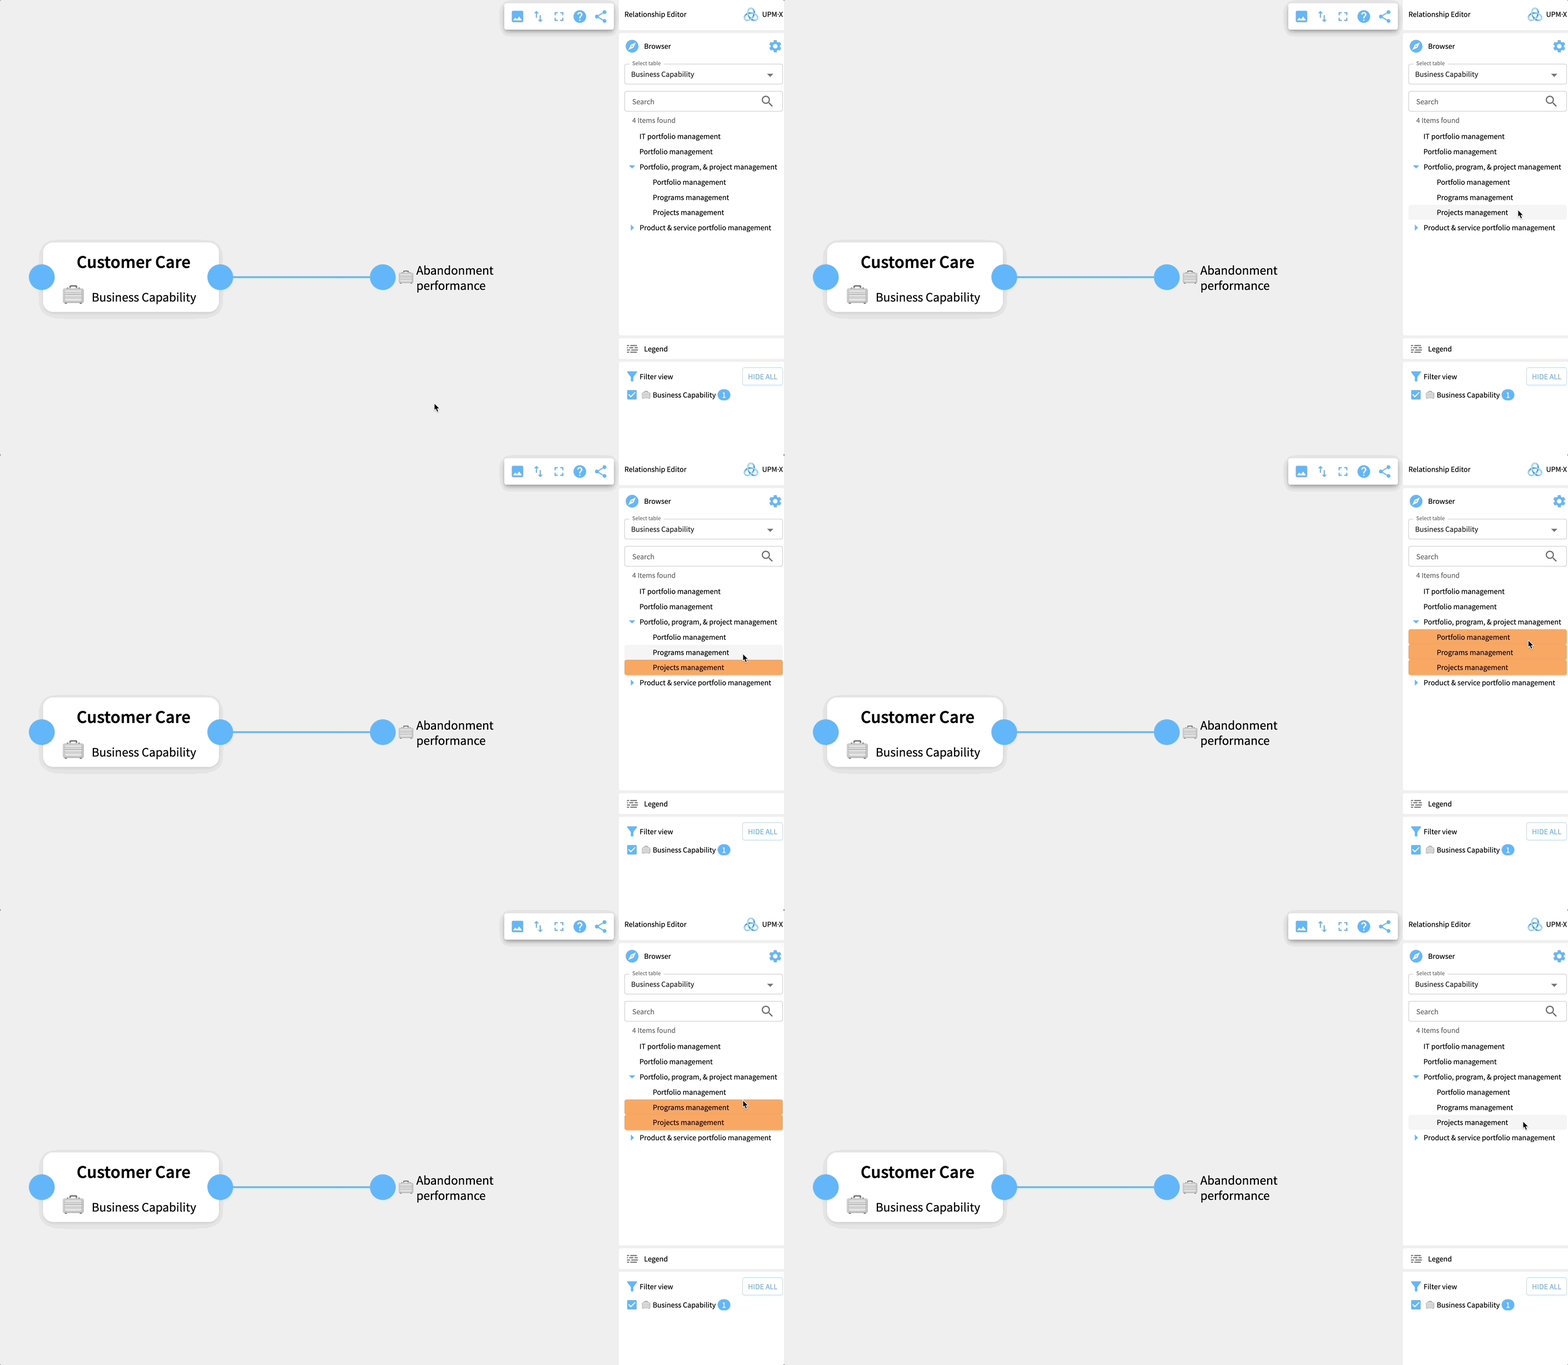
- Drag the elements towards the primary element in the center of the Relationship Editor. If relationships can be made, an orange ring appears around the border of either the left or right circle or both.
- Move your cursor over the top of the left or right circle to make the connections. The circle will change to a solid orange color.
- If more than one relationship type is available a pop-up menu appears. Confirm the types of relationships you want to make between the elements. You can select a type for each relationship individually or you can assign one relationship type for all the elements at once by selecting the bottom tick-box, then choose a relationship type and selecting Assign.
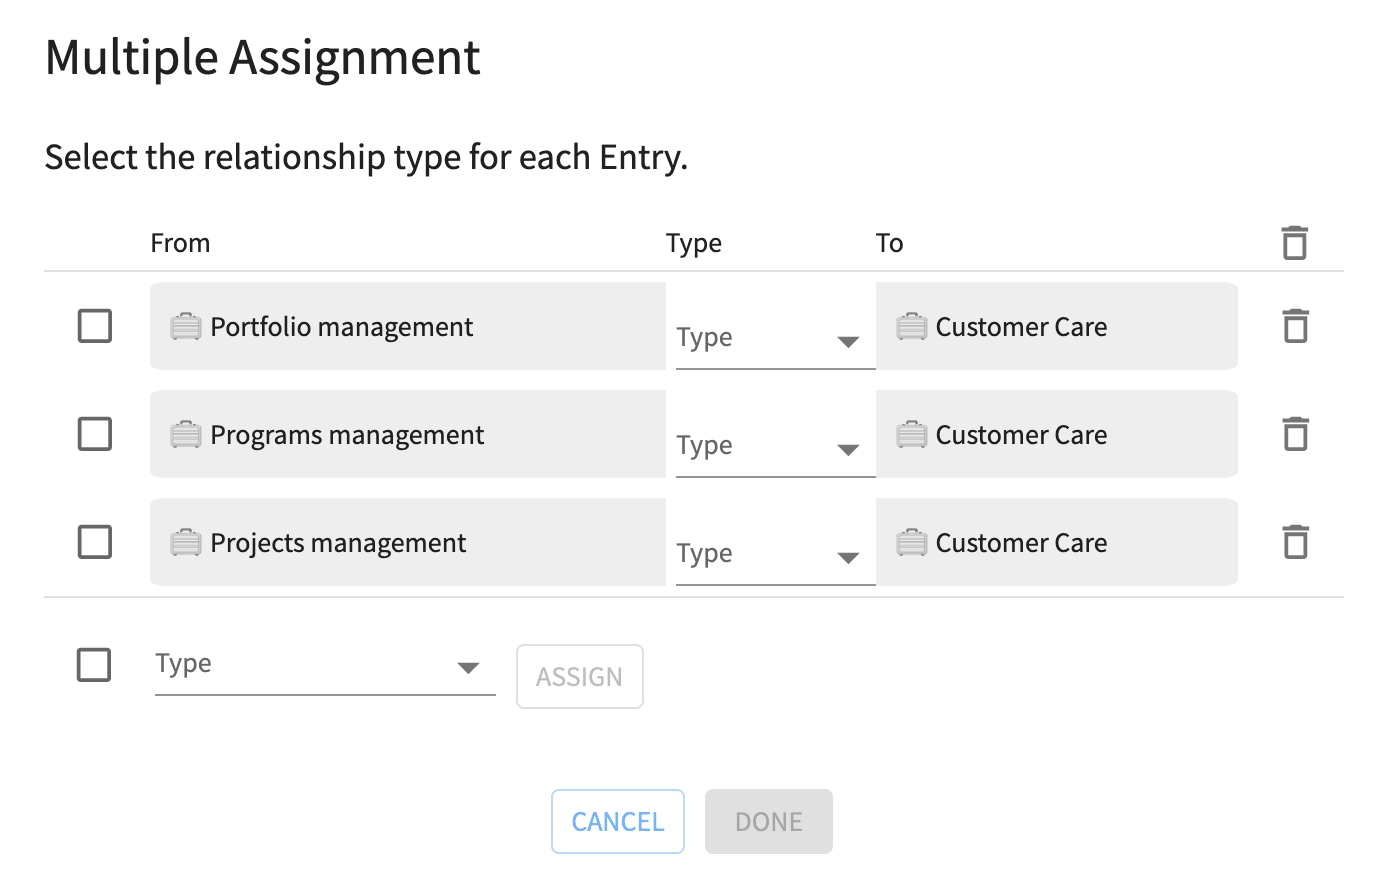
- Select Done.
Specify relationship fields
Certain have multiple suggested relationships to map these elements you must specify its organizational unit. The procedure for mapping these elements is as follows:
- Select the element you wish to map to the primary element.
- The left and right circles of the primary element change color to orange. Drag the mapped element to either circle.
- A Relationships Fields pop-up appears. Choose the relevant Organizational Unit for the element. Select Confirm or Skip for now.
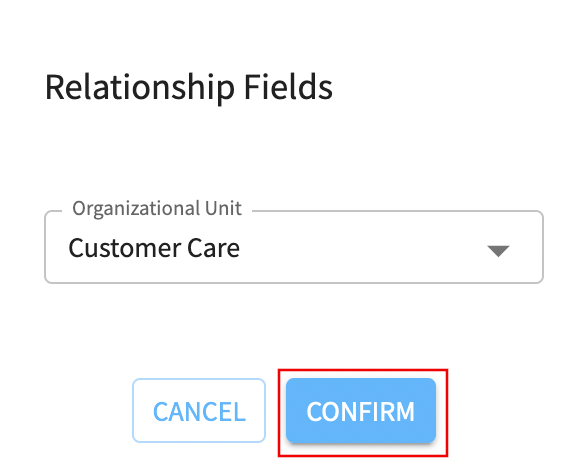
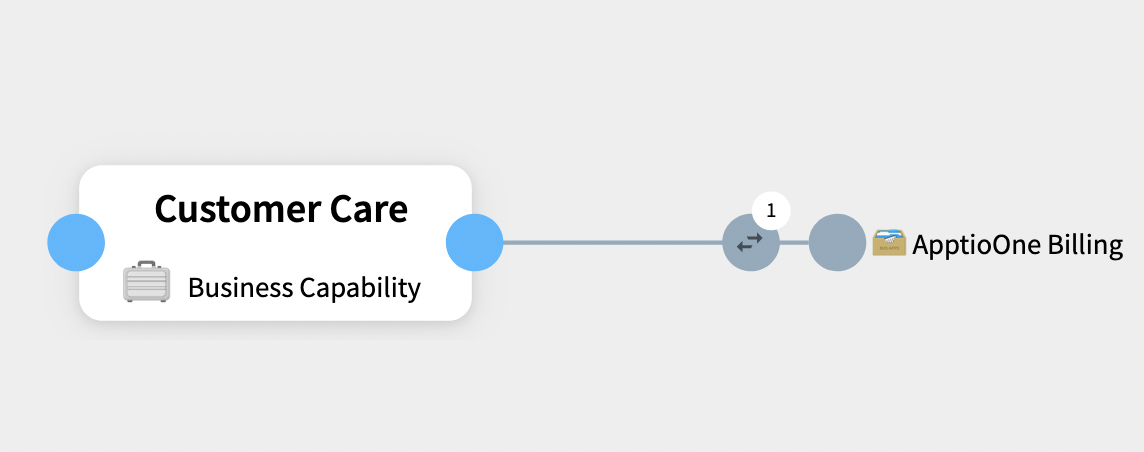
- The element is now mapped to the primary element.
Commit changes
You can commit any relationships you add or delete during a session in the Relationship Editor as follows:
- Select Commit Changes.
- A popup menu containing all the changes you made during your session appears. Select Commit.

Updated about 1 year ago
